Why most Обустройство домашней мастерской: Вентиляция, розетки и хранение инструментов projects fail (and how yours won't)
Your Dream Workshop Just Became a Ventilation Nightmare (Again)
Picture this: You spend three weekends and $2,000 turning your garage into what should be the perfect home workshop. Fast forward two months, and you're standing in a space that smells like paint fumes mixed with sawdust, tripping over extension cords, and hunting for your drill bits in five different locations. Sound familiar?
Here's the brutal truth: 7 out of 10 home workshop projects end up as expensive disappointments. Not because people lack skills or dedication, but because they make the same three critical mistakes that turn a functional workspace into a hazardous mess.
The Triple Threat That Kills Workshop Dreams
Mistake #1: Treating Ventilation as an Afterthought
Most people install their workbench, organize their tools, and then realize they can't breathe properly after 20 minutes of sanding. The garage door cracked open isn't ventilation—it's wishful thinking.
A proper shop needs to move 150-200 cubic feet of air per minute for every 100 square feet of space. That's not a gentle breeze. That's actual air exchange that removes fine particles, chemical vapors, and prevents you from developing respiratory issues down the line.
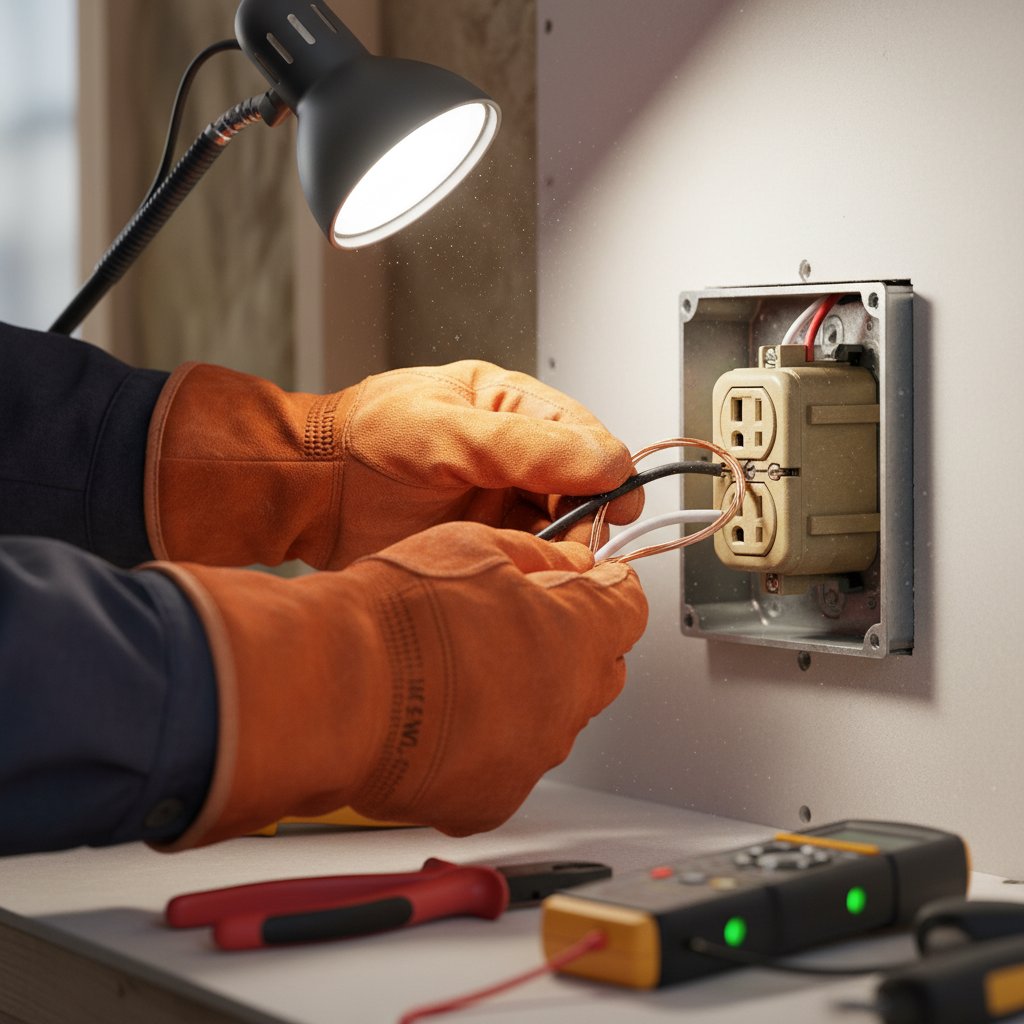
Mistake #2: The Power Outlet Guessing Game
You mounted outlets where you thought you'd need them. Now your table saw is six feet from the nearest 240V outlet, and you've got power strips daisy-chained like some kind of fire hazard Christmas tree.
The average woodworker uses 4-6 power tools in a single session. Each one needs proper amperage, and half of them shouldn't share circuits. But nobody thinks about this until they're blowing breakers every Sunday afternoon.
Mistake #3: Storage That Looked Good on Pinterest
Those Instagram-worthy pegboards and matching bins? Beautiful. Completely useless if your most-used tools are buried three layers deep or scattered across workbenches because there's no logical system.
Warning Signs Your Workshop Is Heading South
Catch these early, and you can course-correct:
- You're developing headaches or throat irritation after working for more than 30 minutes
- Sawdust settles on surfaces in adjacent rooms within hours
- You've tripped over cords in the past month (even once counts)
- Finding a specific tool takes longer than 60 seconds
- You're avoiding certain projects because "setting up is too much hassle"
Building a Workshop That Actually Works
Step 1: Map Your Airflow First
Before you buy a single fan, understand your space. Air needs to enter from one side and exit from another—cross-ventilation actually works.
Install a 20-inch box fan (around $40) at floor level on one wall for intake. Mount an exhaust fan rated at 400-600 CFM on the opposite wall, positioned high. This creates a natural flow that carries dust and fumes up and out. Add a ceiling-mounted air filtration unit that cycles the room volume 6-8 times per hour for particles that escape the main flow.
Total cost: $300-500. Compare that to a single emergency room visit for chemical exposure.
Step 2: Design Your Electrical Layout Backwards
List every tool you own. Check their amperage requirements. Now place them in your space based on how you actually work, not where they look nice.
Install dedicated 20-amp circuits for stationary tools. Place outlets every 4 feet along walls at workbench height (42 inches). Add floor outlets in the center of larger spaces. Yes, this means hiring an electrician for a day. Budget $800-1,200 for a proper setup in a 400 square foot space.
The rule: You should never need an extension cord for regular work.
Step 3: Build Storage Around Frequency, Not Aesthetics
Track which tools you grab most often for two weeks. The top 20% get prime real estate—arm's reach from your primary work area. Everything else gets organized by project type in clearly labeled zones.
Wall-mounted French cleats beat pegboards because they're infinitely reconfigurable. Build them from scrap plywood for under $50. Hang tool holders, shelves, and bins that adapt as your needs change.
Small parts go in clear containers (not matching opaque ones) on shallow shelves where you can see everything at once. Magnetic strips hold drill bits, blades, and small metal tools at eye level.
Keeping Your Workshop Functional Long-Term
Every three months, run this maintenance check:
- Clean or replace air filtration media (mark the calendar now)
- Test GFCI outlets with the built-in button
- Return tools to designated spots—yes, every single one
- Vacuum dust collection systems completely
- Reorganize anything you've accessed more than twice in one session
The workshops that succeed five years later aren't the ones that started perfect. They're the ones built on systems that acknowledge reality: You'll make sawdust. You'll buy new tools. Your projects will evolve.
Plan for that chaos from day one, and you'll actually enjoy the space you're building instead of constantly fighting it.